- PHP 91.8%
- Shell 3.6%
- JavaScript 3.1%
- CSS 1.5%
* outline channel edit page, add hidden tab * enque image uploader hook to admin post action * edit channel method and daemon channel edit method * sanitize supports add form * outline channel edit page, add hidden tab * enque image uploader hook to admin post action * edit channel method and daemon channel edit method |
||
|---|---|---|
| admin | ||
| bin | ||
| classes | ||
| frontend | ||
| inc | ||
| logs | ||
| templates | ||
| tests | ||
| tmp | ||
| vendor | ||
| .gitignore | ||
| .phpcs.xml.dist | ||
| .travis.yml | ||
| composer.json | ||
| composer.lock | ||
| index.php | ||
| lbrypress.php | ||
| phpunit.xml.dist | ||
| README.md | ||
| uninstall.php | ||
LBRYPress - Publish from WordPress to LBRY automatically
This plugin and README are in early development. Thank you for your patience.

How it works
The LBRYPress plugin communicates with the LBRY network via a locally installed SDK. This allows you to create a channel and then mirror any published posts to it. If there are images or GIFs in your post, they will be uploaded to spee.ch (our blockchain-based image sharing service) automatically during the publishing process. If you update a post, it will also be updated on LBRY.
Downloading and installing the WordPress plugin
First, install the LBRYPress plugin on WordPress.
- Download the zip file for this repository.
- In WordPress, upload and install the plugin zip file from the WordPress admin dashboard. After activating, errors will show until the next steps are completed.
- LBRYPress is not currently working correctly with the WordPress block editor, try a plugin that reactivates the classic WP Editor screen. LBRYPress may work in the future with Gutenberg block editor.
Downloading and installing LBRY
This will step you through downloading the LBRY SDK, installing it, and running as a system service.
- Download the latest LBRY SDK from our releases page for your OS:
wget https://github.com/lbryio/lbry-sdk/releases/download/v0.86.1/lbrynet-linux.zip - Make a new directory in /opt named lbry:
mkdir /opt/lbry - You may need to install Unzip:
sudo apt get install unzip - Unzip the file here:
unzip lbrynet-linux.zip -d /opt/lbry - To get started, you can run the SDK manually at first. Open a new terminal,
cd /opt/lbryand run:./lbrynet startOnce you do this, the SDK will startup in the current session and sync with the blockchain. Open a new terminal to issue further commands.
Install LBRY as system service (can skip this step for now)
- Create a file called lbrynet.service and insert it into
/etc/systemd/system/:
[Unit]
Description="LBRYnet daemon"
After=network.target
[Service]
ExecStart=/opt/lbry/lbrynet start
User=YOURUSERNAME
Group=YOURUSERGROUP
Restart=on-failure
KillMode=process
[Install]
WantedBy=multi-user.target
- Run
sudo systemctl daemon-reload - Start it with:
sudo service lbrynet start. If you are already running LBRY in the background, issue albrynet stopcommand first.
Funding and preparing your wallet
LBRY will require LBRY Credits (LBC) for the channel creation and publishing process. You can send LBC to this instance from your LBRY app / lbry.tv using the Wallet page > Send Credits. If you need LBC, sign up for a lbry.tv account or email us. After you send credits, they will be split into smaller amounts to facilitate the publishing process. You can also use an existing LBRY Desktop wallet/ channel by copying the default_wallet file into ~/.local/shared/lbry/lbryum/wallets.
- Go to the LBRYPress plugin page and find your wallet address:
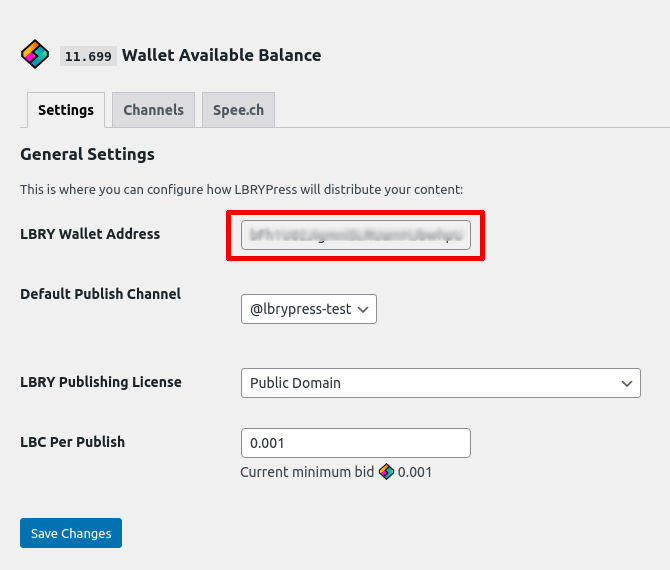
- Copy this address and send at least a few credits to it. From the Desktop app/lbry.tv, go to the Wallet page > Send Credits.
- We will take the amount you deposited and split it up by a factor of 10. So if you deposited 10 LBC, you'd split it into 100: The decimal point is important, it will throw back an error without the structure of "10.0"
- Go to the LBRYnet Directory
cd /opt/lbry/ - Run the command:
./lbrynet account fund --amount=10.0 --outputs=100
Setting up publishing
Experimental: republishing of images in blog to LBRY: If images or GIFs are used in your posts, they should be reposted to as thumbnails similar to the upload process in the LBRY apps. This feature may not work correctly at this time.
Please note: spee.ch channel creation is no longer available and that step can be skiped.
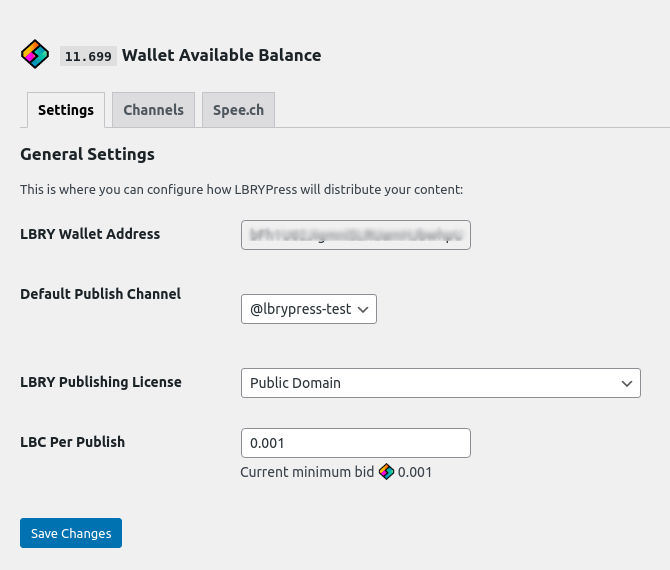
- Select the channel you wish as a Default Publish Channel. Can change later on a per-post basis.
- Select the Default Publish License you wish to use as your default.
- Enter 0.001 for LBC per Publish (later you can add more as a support if needed).
- Click Save Settings.
Setting up your blog publishing channel
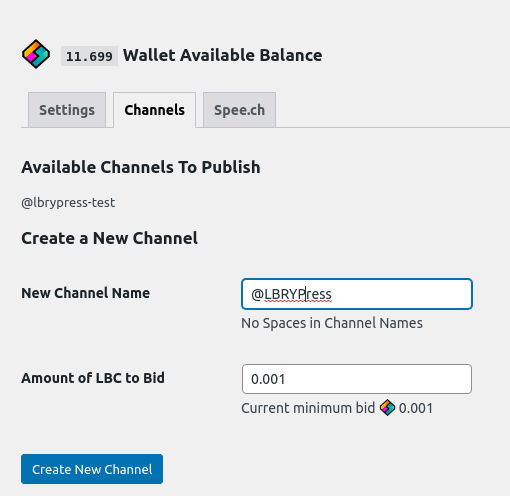
If you don't already have a channel, this process will create a channel in your local wallet where your blog posts will be published to. Any available channels will be listed at the top of the Your Publishable Channels section on the Channels tab.
- Enter the channel you wish to create and publish under in New Channel Name. Your channel will be created with a single @ prefix and all spaces and underscores are changed to a dash. Uppercase characters are allowed. Most special characters are removed.
- Enter an Amount of LBC to Bid of 0.001 (current minimum, you can increase the amount or use supports later). By adding as a support you push your content higher in the search but also keep your LBC fluid and easily moved without needing to abandon your claim.
- Click Add New Channel.

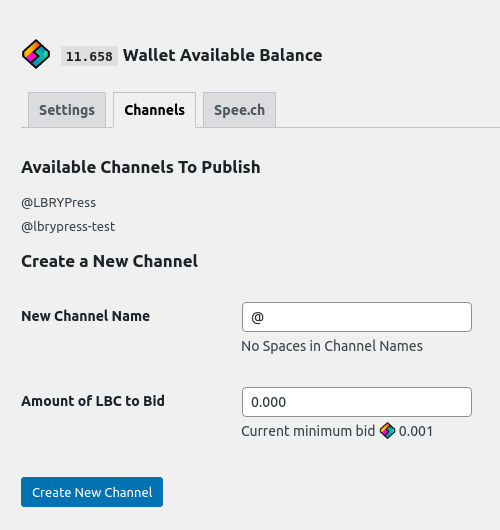
Wait a few minutes and do a page refresh, your new channel should now be in the list.
Publishing blog posts
When creating a new post (or editing an existing one), you can choose to publish it on LBRY as well. If you do this for an existing post, it will not retain the original date (known issue).
- Create your post.
- At the bottom of the Document menu, find LBRY Network, and click Sync this post on channel.
- Select the channel you want to publish it on.
- Click Publish.
- The plugin will automatically add a link to content on LBRY.
- Give it a few minutes to publish and be confirmed on the network (there's currently no feedback for this). Check your content at: https://lbry.tv/@ChannelName.
If you edit a post, it will also create an update on the LBRY network.
Need help?
Email us at hello@lbry.com if you need assistance setting up the LBRYPress plugin.